Saturday, May 16, 2009

Hand-Assembled Photo Albums

Have I mentioned I love photo books? I really do. =)

I have a special spot for hand assembling photo albums. Kolo makes beautiful paper, cloth, and leather albums and they are my absolute favorites.

With the photos I took at one of my dearest friends' wedding, I created two books, one for the bride and groom and one for the bride's parents.

(The final products were photographed on my versatile backdrop.)

The wedding ceremony had taken place in front of a red wall, which made for a striking background in the photos.

I loved the contrast of the bright red on the black pages and how the cream pages matched the bride's wedding dress.


I found the perfect black brocade fabric with red embroidery that matched both album covers and sewed drawstring bags to carry and store the books.


Thursday, April 23, 2009

Two Photos for One Picture

Right after the sun set on New Year's Eve, I glanced out the window and spotted a single bird perched at the top of a tree with a sliver of moon in the background.

Because darkness had already set in, I needed the fastest shutter speed possible, which meant that my aperture (which controls the amount of light allowed through the shutter) had to be as large as possible (meaning the smallest possible Av number - it's inverse).

As mentioned in the blurry background post, a low Av number is used to achieve a blurry background effect. The further away the background is from the subject, the blurrier it will be. In this case, the moon was quite a distance behind the bird and therefore quite blurry.


Since I actually wanted the moon to be in focus in my final image, I took a second shot, this time focusing on the moon, ignoring the fact that the bird and tree would come out blurry.


Armed with my two separate images and Photoshop, I copied the in-focus moon from the second shot and pasted it on top of the blurry moon in my first shot with the in-focus bird. I adjusted the levels and changed the hue of the image to a lovely evening blue. The image is named "Awaiting the New Year".

A Backdrop for This Little Piggy Bank

To create a backdrop for photographing my cute little paint-your-own piggy bank, I threw my multi-functional $1/yd white piece of fabric on the table (near a window for natural diffused light) and draped it over the laundry drying rack behind it. TA DA! Instant studio.


I especially liked the last shot and felt my pig was giving me some attitude, so I had to give her a voice.

Thursday, January 22, 2009

The Gingerbread House

I just had to share this photo of last month's gingerbread house. It makes me feel all warm and Christmas-y just looking at it.


This is another good example of that blurry background effect. Here's what I did:
  1. Set my aperature (Av) setting to its lowest numeric setting (around 4.0 for me)

  2. Zoomed in as far as the telephoto would allow

  3. Moved myself around to fit the house and tree in the frame

  4. Focused on the house, pressed the shutter button halfway down and held it while I framed the shot, then continued to press it all the way down to take the photo

Wednesday, January 14, 2009

Part II: Easy Photo Books That Make You Look Incredibly Talented - Wedding Speech & Colorized Photos

Did I mention I *love* photo books?

Another favorite photo book project was a wedding memento for one of my closest friends. I had given a speech at her wedding and I combined the words from my speech with photos I had taken.

For the colorized effect in some of the photos, I used Photoshop to create a copy of the photo and placed it on top of the original. I converted the top photo to black & white and then used the eraser (50% opacity) to erase the top photo wherever I wanted color to show through. With this technique, I was able to "add" color to specific parts of the photos I wanted to highlight.

Front cover:


Inside cover:


Sample pages of colorized photos with words from my speech:


Part I: Easy Photo Books That Make You Look Incredibly Talented - Art Gallery Book

Ever since customizable, bound photo books became available to the average consumer, I have been a huge fan. They're fairly simple to create, look professional, and are relatively inexpensive ($25-$40 and there are always discounts around the winter holidays). I've created books both in Shutterfly and Kodak Gallery with nice results.

In addition to doing scrapbook-style "Year in Review" photo books, I've found other great applications and wanted to share my favorite projects.

The first project was an art gallery book for my co-worker of her children's artwork. While she was out of town, I snuck into her office, took the artwork off the wall, and photographed each piece individually. (Thankfully, I took a "before" picture of her wall and was able to put the artwork back exactly in its place so she never suspected a thing.)

The inside cover (the photo appeared through the cut-out in the cover):


The perfect quote that I added inside:


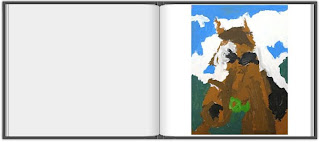
A few sample pages of artwork:


Another idea - publish your children's stories and illustrations!